
The goal of this post to help fill in the gaps from the Microsoft Azure Stack User Documentation on deploying a secured service fabric cluster using the Azure Stack Developer Kit (ASDK). The same steps could easily be used on the Azure Stack integrated system.
Note: The Service Fabric cluster is not a Resource Provider. Instead, it creates a virtual machine scale set with preinstalled software via PowerShell Desired State Configuration within the Tenant Portal.
Prerequisites
1. Certificates to be used as Secrets in Key Vault.
- Cluster Certificate
- PFX certificate to be added to Key Vault for the Service Fabric cluster endpoint.
- This can be a Self-Signed certificate for testing on the ASDK.
- Server Certificate
- PFX certificated also added to Key Vault for the Service Fabric servers.
- This can be a Self-Signed certificate for testing on the ASDK.
- Client Certificate
- Certificate to be stored in the current user personal certificate store used to authenticate to the Service Fabric explorer portal.
- This can be a Self-Signed certificate for testing on the ASDK.
2. An Offer with a Plan that has the following:
- Storage
- KeyVault
- Network
- Compute
3. A tenant user with a subscription to the above Offer.
4. The Marketplace should be populated with the following images:
- PowerShell Desired State Configuration 2.77.0.0
- Custom Script Extension 1.9.3
- Service Fabric Cluster 1.0.2
- Windows Server 2016 Datacenter – Pay-as-you-use 2016.127.20180912

Creating the Self-Signed Certificates
- Open PowerShell as Administrator and run the following to create the three Self-Signed certificates.
- DNS names are not required for the certificates. This just helps me to easily identify them when exporting.
New-SelfSignedCertificate -DnsName servicefabriccluster.local.azurestack.external -CertStoreLocation Cert:\LocalMachine\My\

New-SelfSignedCertificate -DnsName servicefabricserver.local.azurestack.external -CertStoreLocation Cert:\LocalMachine\My\

New-SelfSignedCertificate -DnsName servicefabricclient.local.azurestack.external -CertStoreLocation Cert:\CurrentUser\My\
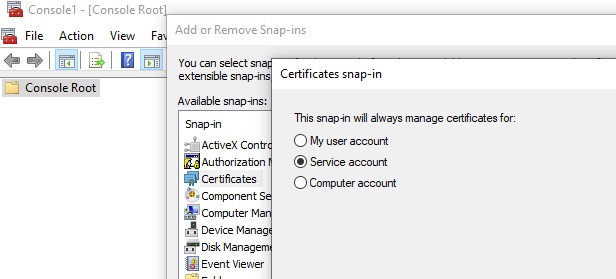
- Open mmc.exe and Add the Certificate snap-in and select “Service Account”.
- Right click the ServiceFabricCluster certificate and select “All Tasks > Export” to export the certificate. When prompted, click “Yes, export the private key” to export it as a PFX

- Export the certificate with the below settings for PFX.

- Repeat the above certificate export steps on the ServiceFabricServer certificate.
Add Secret (Certificates) to Key Vault
To deploy the Service Fabric cluster, we must specify a Key Vault containing the secrets. The input needed for this is the resource ID of the Key Vault, the certificate URL, and certificate thumbprint.
Note: PowerShell must be used to add a secret to Key Vault for use with Service Fabric
- Add the ClusterCertificate to a Key Vault named “sfvault”
function Get-ThumbprintFromPfx($PfxFilePath, $Password)
{
return New-Object System.Security.Cryptography.X509Certificates.X509Certificate2($PfxFilePath, $Password)
}
function Publish-SecretToKeyVault ($PfxFilePath, $Password, $KeyVaultName)
{
$keyVaultSecretName = "ClusterCertificate"
$certContentInBytes = [io.file]::ReadAllBytes($PfxFilePath)
$pfxAsBase64EncodedString = [System.Convert]::ToBase64String($certContentInBytes)
$jsonObject = ConvertTo-Json -Depth 10 ([pscustomobject]@{
data = $pfxAsBase64EncodedString
dataType = 'pfx'
password = $Password
})
$jsonObjectBytes = [System.Text.Encoding]::UTF8.GetBytes($jsonObject)
$jsonEncoded = [System.Convert]::ToBase64String($jsonObjectBytes)
$secret = ConvertTo-SecureString -String $jsonEncoded -AsPlainText -Force
$keyVaultSecret = Set-AzureKeyVaultSecret -VaultName $KeyVaultName -Name $keyVaultSecretName -SecretValue $secret
$pfxCertObject = Get-ThumbprintFromPfx -PfxFilePath $PfxFilePath -Password $Password
Write-Host "KeyVault id: " -ForegroundColor Green
(Get-AzureRmKeyVault -VaultName $KeyVaultName).ResourceId
Write-Host "Secret Id: " -ForegroundColor Green
(Get-AzureKeyVaultSecret -VaultName $KeyVaultName -Name $keyVaultSecretName).id
Write-Host "Cluster Certificate Thumbprint: " -ForegroundColor Green
$pfxCertObject.Thumbprint
}
#========================== CHANGE THESE VALUES ===============================
$armEndpoint = "https://management.local.azurestack.external"
$location = "local"
$clusterCertPfxPath = "Your_path_to_ClusterCert.pfx"
$clusterCertPfxPassword = "Your_password_for_ClusterCert.pfx"
#==============================================================================
Add-AzureRmEnvironment -Name AzureStack -ARMEndpoint $armEndpoint
Login-AzureRmAccount -Environment AzureStack -TenantId $tenantId
$rgName = "sfvaultrg"
Write-Host "Creating Resource Group..." -ForegroundColor Yellow
New-AzureRmResourceGroup -Name $rgName -Location $location
Write-Host "Creating Key Vault..." -ForegroundColor Yellow
$Vault = New-AzureRmKeyVault -VaultName sfvault -ResourceGroupName $rgName -Location $location -EnabledForTemplateDeployment -EnabledForDeployment -EnabledForDiskEncryption
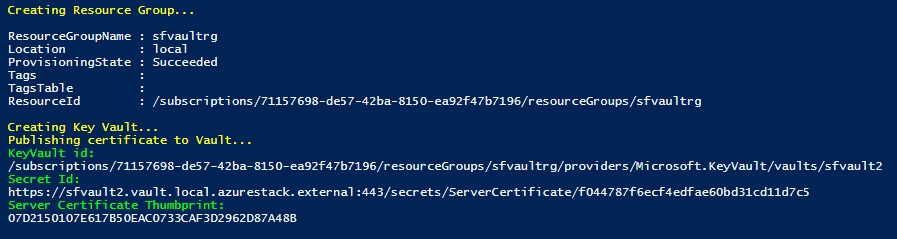
Write-Host "Publishing certificate to Vault..." -ForegroundColor Yellow
Publish-SecretToKeyVault -PfxFilePath $clusterCertPfxPath -Password $clusterCertPfxPassword -KeyVaultName $vault.VaultName
- Save the output from the PowerShell window as you will need it later when deploying the Service Fabric cluster.

- Next, we will run a modified version of the above script to add the ServerCertificate to the same Key Vault created above.
function Get-ThumbprintFromPfx($PfxFilePath, $Password)
      {
          return New-Object System.Security.Cryptography.X509Certificates.X509Certificate2($PfxFilePath, $Password)
      }

  function Publish-SecretToKeyVault ($PfxFilePath, $Password, $KeyVaultName)
     {
          $keyVaultSecretName = "ServerCertificate"
          $certContentInBytes = [io.file]::ReadAllBytes($PfxFilePath)
          $pfxAsBase64EncodedString = [System.Convert]::ToBase64String($certContentInBytes)

          $jsonObject = ConvertTo-Json -Depth 10 ([pscustomobject]@{
              data     = $pfxAsBase64EncodedString
              dataType = 'pfx'
              password = $Password
          })

          $jsonObjectBytes = [System.Text.Encoding]::UTF8.GetBytes($jsonObject)
          $jsonEncoded = [System.Convert]::ToBase64String($jsonObjectBytes)
          $secret = ConvertTo-SecureString -String $jsonEncoded -AsPlainText -Force
          $keyVaultSecret = Set-AzureKeyVaultSecret -VaultName $KeyVaultName -Name $keyVaultSecretName -SecretValue $secret

          $pfxCertObject = Get-ThumbprintFromPfx -PfxFilePath $PfxFilePath -Password $Password

          Write-Host "KeyVault id: " -ForegroundColor Green
          (Get-AzureRmKeyVault -VaultName $KeyVaultName).ResourceId

          Write-Host "Secret Id: " -ForegroundColor Green
          (Get-AzureKeyVaultSecret -VaultName $KeyVaultName -Name $keyVaultSecretName).id

          Write-Host "Server Certificate Thumbprint: " -ForegroundColor Green
          $pfxCertObject.Thumbprint
     }

  #========================== CHANGE THESE VALUES ===============================
  $armEndpoint = "https://management.local.azurestack.external"
  $location = "local"
  $clusterCertPfxPath = "Your_path_to_ServerCert.pfx"
  $clusterCertPfxPassword = "Your_password_for_ServerCert.pfx"
  #==============================================================================

  Add-AzureRmEnvironment -Name AzureStack -ARMEndpoint $armEndpoint
  Login-AzureRmAccount -Environment AzureStack

  $rgName = "sfvaultrg"
  Write-Host "Creating Resource Group..." -ForegroundColor Yellow
  New-AzureRmResourceGroup -Name $rgName -Location $location

  Write-Host "Creating Key Vault..." -ForegroundColor Yellow
  $Vault = "sfvault"

  Write-Host "Publishing certificate to Vault..." -ForegroundColor Yellow
  Publish-SecretToKeyVault -PfxFilePath $clusterCertPfxPath -Password $clusterCertPfxPassword -KeyVaultName $vault
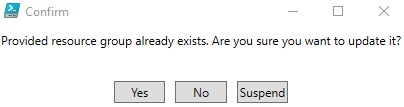
- Since the resource group was created by the previous script, you will receive a prompt to update the existing resource group. When prompted, click yes.
- Save the output from the PowerShell window as you will need it later when deploying the Service Fabric cluster.
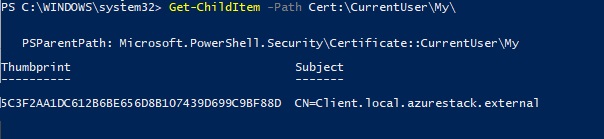
- Finally, lets get the Thumbprint of the Client Certificate that we created earlier and placed into the Current User personal store.
Get-ChildItem -Path Cert:\CurrentUser\My\
- Save the output from the PowerShell window as you will need it later when deploying the Service Fabric cluster.
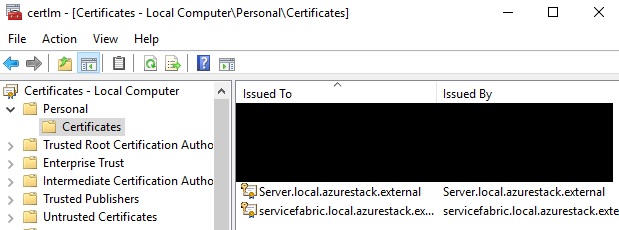
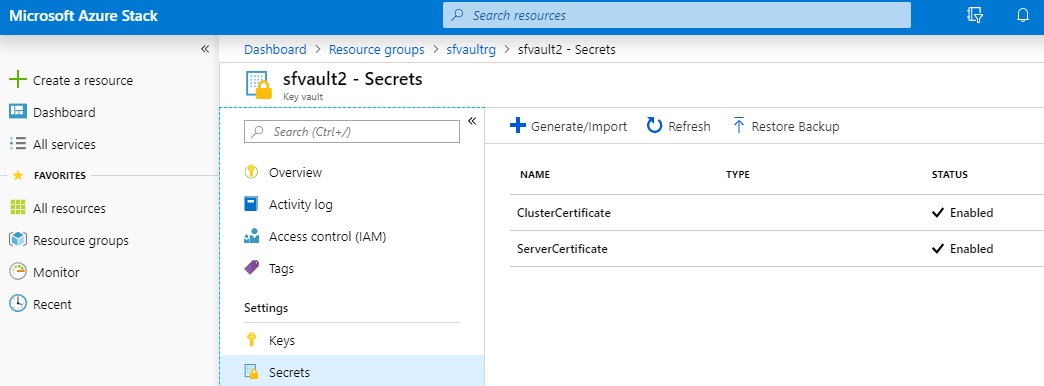
- Verify the Secrets have been added to Key Vault by logging into the User Portal and browsing the Key Vault.
Deploy a Service Fabric Cluster via the Tenant Portal
Now that all of the requirements are in place, we are ready to deploy our first Service Fabric cluster! The screenshots for this procedure have not been updated in Azure Stack User Documentation for Service Fabric 1.0.2. I have included updated screenshots below to assist with this deployment.
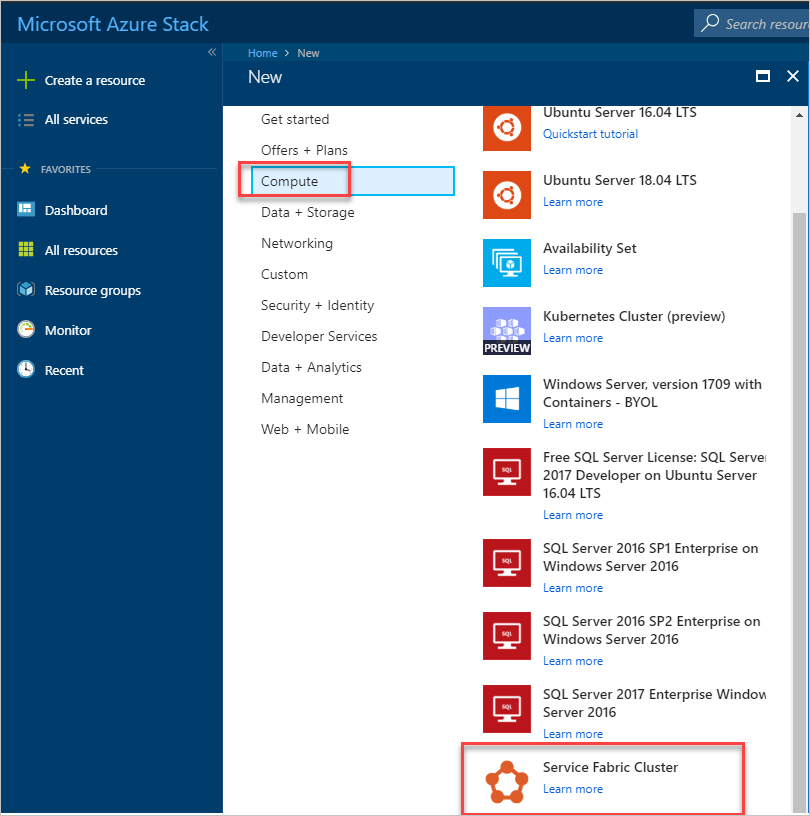
- In the user portal, go to + Create a resource > Compute > Service Fabric Cluster.
- For each page, like Basics, fill out the deployment form. Use defaults if you’re not sure of a value. Select OK to advance to the next page:

- On the Network Settings page, you can specify specific ports to open for your applications:

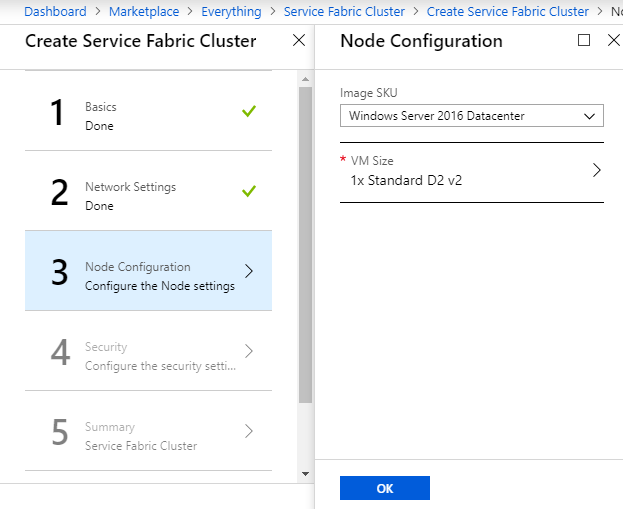
- On the Node Configuration page, specify the VM size of the nodes.
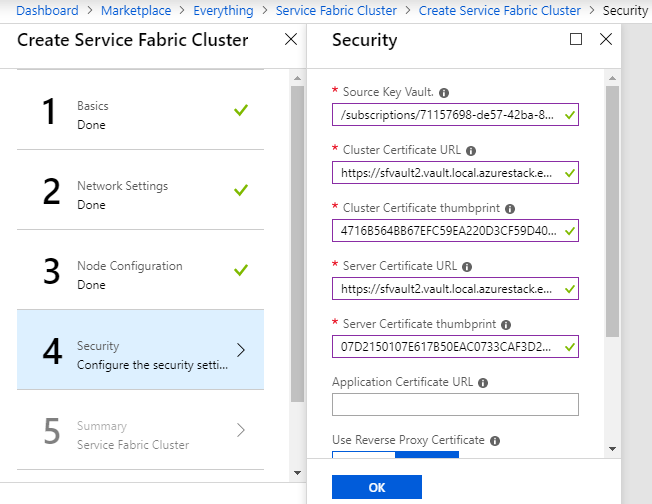
- On the Security page, add the values that you got from creating the Key Vault and Uploading the Secret (certificate). This is the PowerShell output saved in the earlier steps above.
- Complete the wizard, and then select Create to deploy the Service Fabric Cluster.
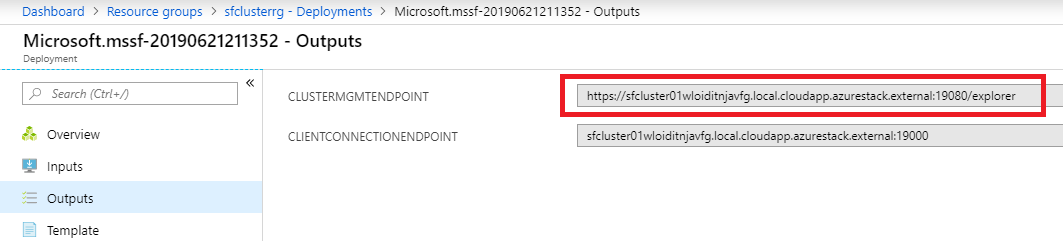
Once the deployment completes, you can view the output from the deployment to get the Service Fabric cluster management endpoint.
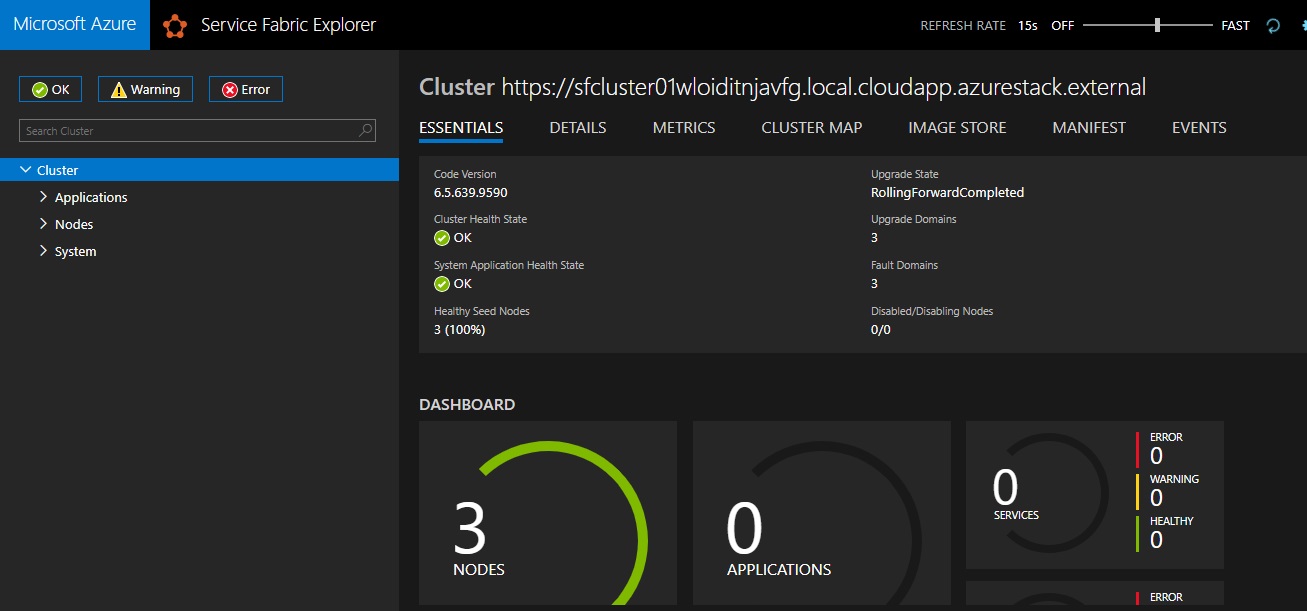
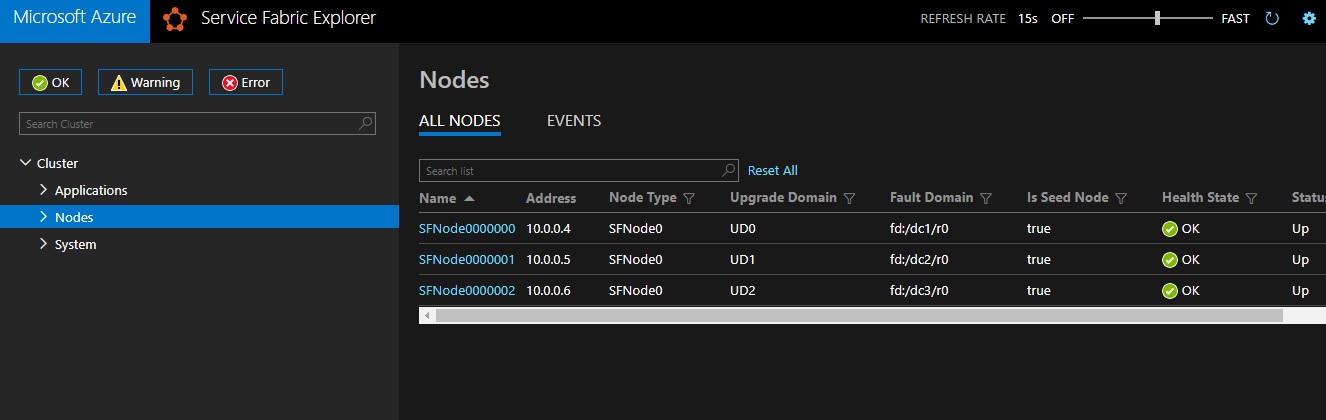
Finally, lets validate the Service Fabric cluster by logging into the cluster management endpoint!

I hope you found this guide helpful!
Please feel free to leave a comment if you run into any issues or if anything wasn’t quite clear.

Nice write up Chris!
slick! 14 2025 Simplifying and Understanding Dell’s Patch and Update Process for Azure Stack Hub (14G) good